 by
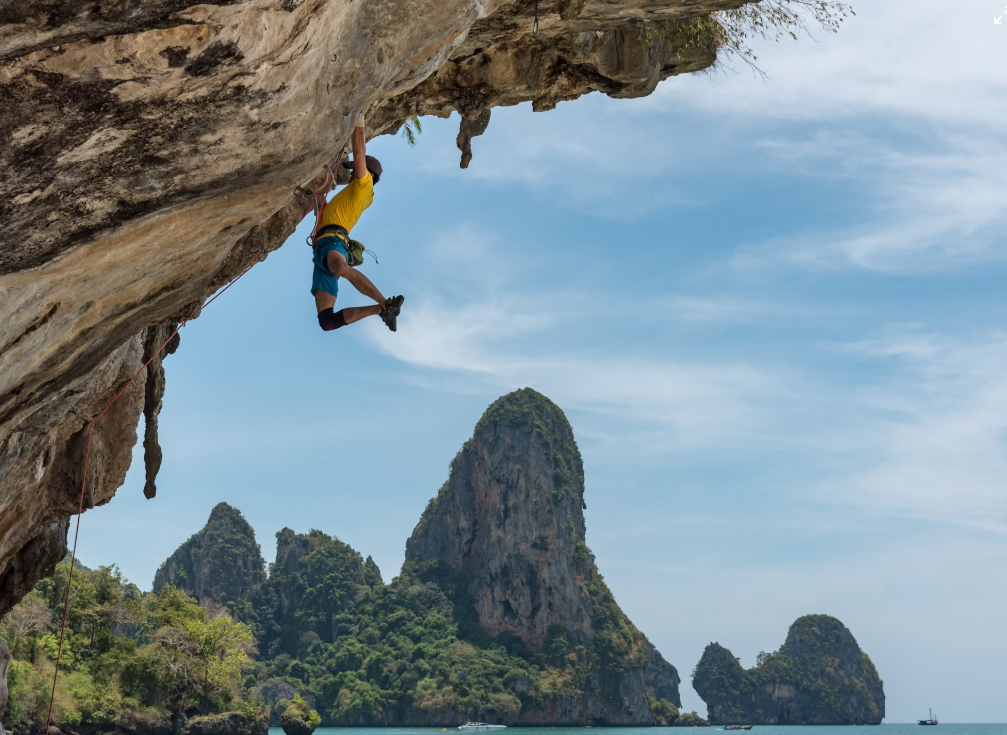
by Rock climbing in the Swiss Alps around Saint Moritz is an exhilarating way to experience some of the world’s most spectacular alpine scenery. Towering granite walls, limestone crags, and multi‑pitch routes set against glacial backdrops create an unforgettable playground for climbers of all levels. However, the combination of high altitude, unpredictable weather, technical terrain, and remote locations also makes safety paramount. This comprehensive guide (approximately 1,600 words) covers everything you need to know—from planning and equipment to on‑route techniques, emergency preparedness, and environmental stewardship—so you can climb confidently and responsibly in this iconic region.
1. Planning and Preparation
1.1 Researching Routes and Conditions
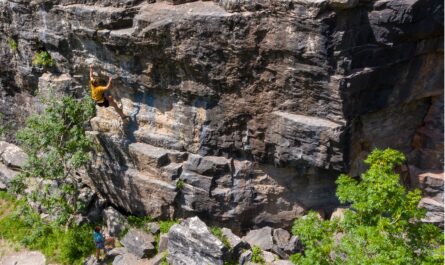
- Select Appropriate Routes: Saint Moritz and its surroundings offer a vast spectrum of climbs—from single‑pitch sport routes at Corn da Tinizong (graded 4a–7b) to serious alpine multi‑pitches on Piz Bernina and Piz Palü. Use up‑to‑date guidebooks (e.g., Swiss Alpine Club guides), online topo databases, and local climbing forums to choose routes that match your technical grade, exposure tolerance, and experience level.
- Understand Seasonal Variations: Many rock faces in the high Alps remain snow‑covered until mid‑July, while late‑season rockfall becomes a hazard in August and September. Lower‑elevation crags near Saint Moritz (e.g., Pontresina) are climbable from May through October, whereas glacier‑approach routes require crampons and ice‑axe skills well into summer.
- Check Weather Forecasts: Alpine weather is notoriously fickle. Consult specialized forecasts (MeteoSwiss or Meteoblue) for hourly precipitation, wind speed, and temperature at different elevations. Plan climbs early in the morning to avoid afternoon thunderstorms and rockfall triggered by solar heating.
1.2 Physical and Altitude Acclimatization
- Build Aerobic Fitness: Even moderate routes can feel taxing at 2,000–3,000 meters. Incorporate endurance training—trail running, cycling, or long hikes—to boost cardiovascular capacity.
- Acclimatize Gradually: Spend at least 24–48 hours at moderate elevation (1,800–2,200 m) before tackling higher climbs. Take short acclimatization hikes, and watch for early signs of acute mountain sickness: headache, nausea, dizziness, or insomnia.
- Hydrate and Fuel Properly: Alpine air is cold and dry, increasing fluid loss. Aim for 3–4 L of water daily, supplemented by electrolyte tablets. Pack high‑energy snacks—nuts, energy bars, dried fruit—and eat small amounts frequently to maintain blood sugar and mental clarity.
1.3 Obtaining Permits and Respecting Regulations
- Protected Areas and Closures: Portions of the Engadine Valley fall within Swiss national parks and nature reserves. Check seasonal closures for bird‑nesting sites (e.g., golden eagle territories) and adhere to posted access restrictions.
- Local Climbing Ethics: Many crags around Saint Moritz are on private or community‑managed land. Respect fixed gear, avoid unnecessary bolting, and clean up any litter. Contact local alpine clubs (SAC sections) for guidance on new bolting requests or trail maintenance.
2. Essential Gear Checklist
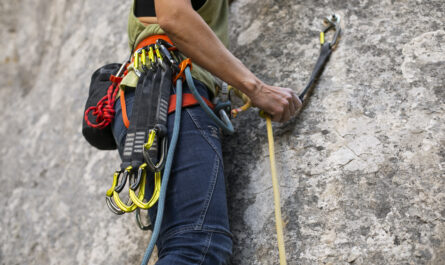
2.1 Personal Protective Equipment
- Helmet (UIAA/CE Certified): Protects against rockfall, ice shards, and head impacts during falls. Inspect for cracks before each trip.
- Climbing Shoes: Choose stiff‑soled alpine approach shoes or rock‑climbing shoes with sticky rubber, depending on route type. Ensure a snug but comfortable fit to prevent foot fatigue on long climbs.
- Harness: A lightweight, adjustable alpine harness with gear loops and a secure belay loop. Double‑check buckles and stitching for wear.
- Gloves: Fingerless or full gloves for belaying and rappelling to prevent rope burns.
2.2 Ropes and Protection
- Dynamic Rope: A 60–70 m single rope (9.4–9.8 mm) with good handling characteristics. For multi‑pitch alpine routes, consider two ropes (twin or half‑rope system) for easier rappels and reduced rope drag.
- Quickdraws & Alpine Draws: Carry at least 12–16 quickdraws on sport routes; for trad or mixed routes, include alpine draws (longer slings) to reduce rope drag around corners.
- Trad Gear (if applicable): A set of cams (small to large), nuts, hexes, and tricams rated for alpine conditions. Practice placing and cleaning gear in low‑stress settings before relying on it in remote areas.
- Slings and Cordelettes: Several sewn slings (60 cm and 120 cm) and a 5 mm cord or tape for building equalized anchors.
- Locking Carabiners: At least two HMS‑style (pear‑shaped) and two D‑shaped locking carabiners for belay and anchor work.
2.3 Clothing and Accessories
- Layered Clothing System:
- Base Layer: Moisture‑wicking synthetic or merino wool.
- Insulating Layer: Lightweight fleece or synthetic jacket.
- Outer Shell: Waterproof‑breathable jacket and pants (e.g., Gore‑Tex) to block wind, rain, and snow.
- Approach & Descent Footwear: Sturdy approach shoes or lightweight hiking boots with good traction for scree and snowfield crossings.
- Sun Protection: UV‑blocking sunglasses, broad‑spectrum sunscreen (SPF 50+), and a wide‑brimmed hat or buff.
- Headlamp: Compact, high‑lumens headlamp with spare batteries—essential if a route runs late or you need to navigate the descent in fading light.
3. Alpine‑Specific Techniques
3.1 Rock‑Snow Transition Skills
- Self‑Arrest with Ice Axe: Practice plunging the pick into snow during controlled falls. On mixed terrain, carry an ice axe even for predominantly rock routes if snow persists above belay stations.
- Crampon Use: Fit and walk in lightweight crampons on approach and descent if snowfields remain. Test each step before committing weight, especially on steep slopes.
3.2 Route Finding and Navigation
- Topo Maps and GPS: Study topos in advance, marking key features—belay ledges, fixed gear, descent gullies. Load GPX tracks onto a GPS device or phone app (e.g., SwissTopo).
- Landmark Recognition: Note distinctive rock formations, patches of vegetation, or scree cones to confirm you’re on route. In poor visibility, avoid off‑route chimneys or loose gullies.
- Rope Team Management: On exposed traverses or ridge scrambles, move as a rope team with short intervals, using anchors to protect against long falls.
3.3 Building Solid Anchors and Belays
- Natural vs. Fixed Protection: Wherever possible, back up fixed pitons or bolts with your own gear. Use natural features—chockstones, horns, threads—when bolts are sparse.
- Equalization and Redundancy: Use cordelette or slings to create master point anchors that distribute load evenly across multiple pieces. Clip belay devices into the master point, not directly onto a single piece.
- Belay Techniques: Use a Munter hitch or assisted‑braking device (e.g., GriGri) for smoother lowering and safer catch. Keep the brake strand of rope under control at all times.
4. Weather, Rockfall, and Objective Hazards
4.1 Monitoring Weather On‑Route
- Early Start: Begin climbs at dawn when temperatures are lowest, reducing rockfall risk and increasing snowfield stability.
- Visual Cues: Watch for darkening clouds, rising winds, and distant thunder—signals that storms are brewing. On seeing these, commit to retreat or rapid descent.
- Temperature Swings: Midday sun can warm rock faces, dislodging loose blocks. Helmets must remain on even in comfortable weather.
4.2 Rockfall Prevention and Response
- Helmet Always On: Never remove your helmet on route, even during “easy” sections.
- Climb Under Cover: On multi‑pitch routes, ascend under the protection of overhangs or ledges where possible.
- Communication: Yell “Rock!” to warn climbers below, and wait for an “OK” before proceeding. When cleaning gear, stand to the side of the fall line.
4.3 Avalanche and Ice Hazards (Winter/Spring)
- Avalanche Risk: In shoulder seasons, cornices and wind slabs can break unexpectedly near ridgelines. Carry avalanche transceiver, probe, and shovel if crossing avalanche‑prone slopes.
- Ice Fall: On mixed routes, be alert for ice seracs or hanging glaciers above. Plan your route to avoid objective ice fall zones.
5. Climbing with Partners and Guides
5.1 Choosing the Right Partner
- Skill Match: Ensure your partner has equal or higher proficiency in rock‑climbing techniques, rope management, anchor building, and first aid.
- Complementary Strengths: One partner’s route‑finding skills combined with the other’s technical prowess can enhance safety.
- Communication Style: Practice clear calls (e.g., “On belay,” “Climbing,” “Off belay”) and agree on nonverbal signals for situations when verbal communication is difficult.
5.2 Hiring a Certified Guide
- UIAGM/IFMGA Guides: For complex multi‑pitch routes or unfamiliar terrain, a certified mountain guide can manage rope teams, assess hazards, and lead safe ascents and descents.
- Local Expertise: Guides bring intimate knowledge of seasonal conditions, hidden descent paths, and up‑to‑date beta on route quality and closures.
6. Emergency Preparedness and Rescue
6.1 Communication Devices
- Mobile Phone & Power Bank: Ensure your phone is fully charged; carry a waterproof pouch and a backup power bank. Note that reception may be intermittent above tree line.
- Satellite Communicator: Devices like Garmin inReach or ZOLEO provide two‑way messaging and SOS capability when out of cellular range.
- Emergency Numbers: In Switzerland dial 144 for medical emergencies, 1414 for mountain rescue, or use the Alpine Rescue app to send your GPS coordinates.
6.2 First‑Aid Essentials and Skills
- Compact First‑Aid Kit: Include blister dressings, adhesive bandages, triangular sling, tape, pain relievers, antiseptic wipes, and a foil blanket.
- Wilderness First‑Aid Training: Knowing how to splint fractures, manage bleeding, treat hypothermia, and stabilize head injuries can be lifesaving. Consider a certified wilderness first‑aid course.
6.3 Self‑Rescue and Retreat Strategies
- Turn‑Back Points: Pre‑define objective criteria—time limits, weather thresholds, rope drop points—at which you will retreat regardless of progress.
- Abseiling and Rappelling: Practice safe rappelling techniques, including threading ropes correctly, using backups (prusiks or autoblocks), and avoiding rappelling on frozen or icy ropes.
- Trailhead Reconnaissance: Memorize descent trails and alternative escape routes before starting. In poor visibility, follow cairns and painted route markers carefully.
7. Environmental Stewardship and Local Etiquette
7.1 Leave No Trace Principles
- Pack Out Waste: Carry out all trash, food scraps, and tape or cord cuttings. Even biodegradable items can disrupt fragile alpine ecosystems.
- Stick to Established Trails: Avoid creating new paths that accelerate erosion on scree slopes and meadows.
- Minimal Chalk Use: Excess chalk scars rock surfaces. Use chalk sparingly and brush holds clean after climbing.
7.2 Respecting Local Culture
- Greetings and Courtesy: In the Engadine region, a simple “Grüezi” or “Allegra” goes a long way. Share beta politely, yield on narrow ledges, and maintain a friendly demeanor.
- Supporting Local Businesses: Hire local guides, stay in family‑run guesthouses, and patronize nearby mountain huts (e.g., Chamanna Coaz, Tschierva Hut) to sustain the alpine community.
8. Post‑Climb Reflection and Learning
- Debrief with Your Partner: Discuss what went well, challenges encountered, and lessons learned—gear choices, route‑finding errors, or communication breakdowns.
- Record in a Climbing Log: Document route name, grade, conditions, and personal performance notes. Over time, you’ll identify patterns in your strengths and areas for improvement.
- Continuous Skills Development: Regularly refresh self‑arrest practice, anchor building, and first‑aid skills. Attend workshops or join local climbing clubs to stay current on best practices.
Conclusion
Rock climbing in the Swiss Alps near Saint Moritz offers a rare blend of technical challenge and alpine splendor. By investing time in thorough planning, acquiring and maintaining the right gear, honing alpine‑specific techniques, and embracing a culture of safety and environmental stewardship, you can transform a potentially risky endeavor into a deeply rewarding adventure. Remember that every climb—whether a sunny day on a sport wall or a storm‑shadowed alpine ascent—presents unique hazards. Cultivate respect for the mountains, practice humility in the face of objective dangers, and continuously refine your skills. With these safety tips and a commitment to responsible climbing, you’ll be well‑equipped to explore the limestone crags, granite faces, and glacier‑guarded peaks that make the Saint Moritz region a world‑class climbing destination.